Last updated 26/11/2020.
Back to resources menu.
Any stock items that you add to Groundleader can be allocated either directly to a customer or when logging a visit.
Managing stock items
To set up your stock items choose the ‘Manage stock items’ option in the ‘Visits & Stock’ section of the main menu. This page will list all the stock items you have already added.
Stock categories
To make finding stock items easier they are split up into categories, initially you will only have the ‘Herbicide/pesticide’ category available. This is a special category used by Groundleader to produce a spraying report, this category cannot be edited or deleted.
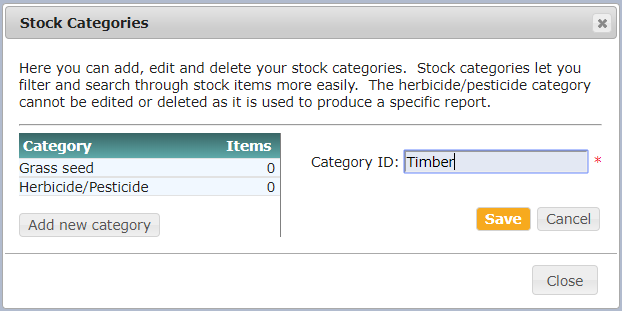
To add new categories click the ‘Manage categories’ button on the ‘Manage stock’ page. Click on an existing category to edit its name or delete it, click the ‘add new category’ button to add a new one.

Adding a new timber category.
Click ‘save’ to store the new category and ‘close’ to return to the main stock page.
Adding a stock item
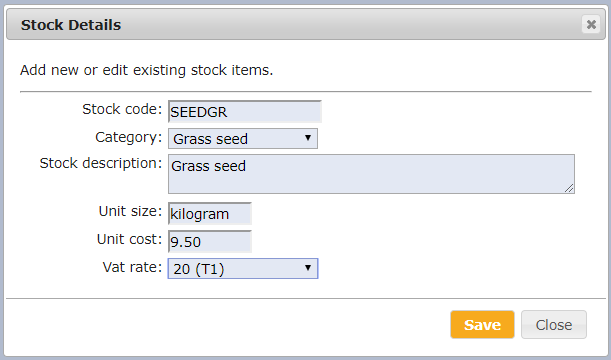
Once you have your categories set up you can add your stock items, clicking the ‘Add new’ button will open the stock item form.

The add/edit stock item form.
Fill out this form to add a stock item.
- Stock code. Enter a unique stock code for each stock item.
- Category. Select the category this stock item belongs to.
- Stock description. Enter a short description of the stock item.
- Unit size. Enter the unit size that this item is sold by, for example kilogram, liter or box.
- Unit cost. Enter the cost per unit of this stock item.
- Tax rate. This option will only be shown if you are tax registered. The standard tax rate will have been added for you, any other rates will need to be added on the tax rates page.
Click save to save the stock item.
Editing stock items
To edit an existing stock item you will need to select it from the stock list. To narrow down the items in the list you can search by stock code, stock description or category. Click the ‘Apply filters’ button to update the list by your selected filters.
Allocate stock to customer
Allocating stock to a customer can be done here on the manage stock page, on the customer page, from the main menu and on the raise invoice page.
From the manage stock page
To allocate stock to a customer from this page click the ‘Sell to customer’ button. You will then need to enter the desired customer by ID or name.
From the main menu
Select the ‘Log stock sold’ option from the ‘Visits & stock’ section of the main menu then select the customer you want to allocate stock to.
From the customers page
On the customers page, with the desired customer selected, click the ‘Allocate stock’ button in the left panel on the page.
From the raise invoice page
On the raise invoice page, with the desired customer selected, click the ‘Allocate stock’ button at the right of the page above the invoice table.
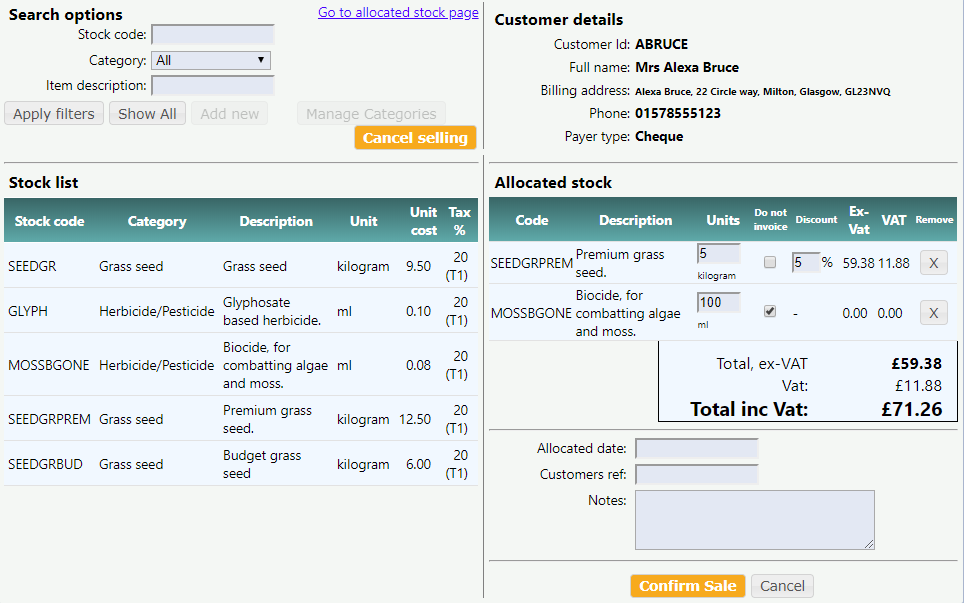
The allocate stock form
Whichever way you chose to get to the form it will be displayed with your stored stock items to the left and information about stock you have allocated to the right.

Click on a stored stock item to allocate it to the customer, you can use the search filters to refine the stock list. Once a stock item has been selected you will need to enter the following:
- Units. Enter the number of units allocated to the customer.
- Do not invoice. If you need to log a stock item as having been allocated to the customer but don’t want it to be charged for or appear on the invoice check this box. This can be used when performing a fixed price spraying visit, the stock wont show on the invoice but will still be included in any spraying report created for the customer.
- Discount. Enter any percentage discount you want to apply to the item cost here. If the customer has a discount percentage set it will be loaded as default
You will also need to enter the allocation date. Optional things to enter are a customers reference and any notes (both will appear on the invoice).
Finally click ‘Confirm sale’ to allocate the stock to the customer.
Allocate stock to a visit
When logging a visit using either the single visit form or the log team visits page there will be an option to allocate stock to the visit. Clicking this link will bring up the same allocate stock form shown above. Use this in the same way as already described to allocate stock to a visit. The only difference is that the allocation date is not required here as the visit date will be used.
If editing a visit you can edit any stock allocated to it using the same ‘allocate stock’ link in the visit form.
View allocated stock
You can view all allocated stock items by selecting the ‘View stock sold’ option from the ‘Visits & stock’ section of the main menu. The list on this page can be filtered by customer, stock code and stock category using the options at the top of the page.
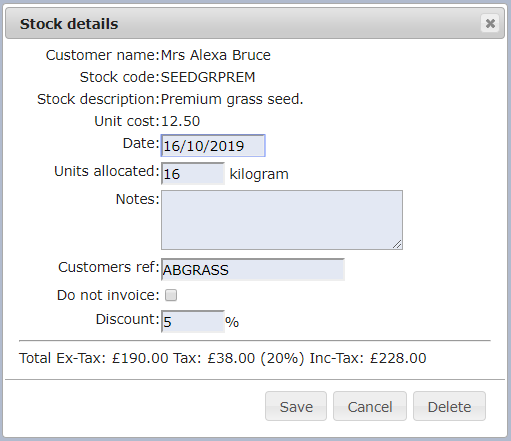
To view, edit or delete an allocated stock item select it from the list.

The edit allocated stock form
Click save to save your changes or delete to delete the record.
Non stock items
A non stock item is a stock item that can be allocated to a customer without first being added to Groundleaders stock page. See the non stock item/visit resources page for more information.
